
By Ali Elsberry
With Mother’s Day coming up, or perhaps the approaching birthday of someone who appreciates gifts from the heart, here is a little idea to make with little hands.
Spring is an excellent time of the year to get crafty; leaves have emerged, blossoms have opened, and the weather has improved, which makes gathering your materials that much more enjoyable. Plus, that energizing spring energy has everyone excited to be spending more time outside!
I have done this project with my children at various ages, and it has always been a hit. What you will need:
- A couple handfuls of colorful leaves and flowers (dandelions, clover, periwinkle, and Japanese maple leaves all work well)
- Two 4”x 4” pieces of white or light-colored cotton fabric, or one 4”x 8” piece (to fold in half)
- A hammer or large, flat rock
- A thick wooden cutting board
- Dried lavender buds or other nicely scented, dried herbs
- Sewing machine or needle and thread
Go outside with your children and collect your plants; make sure to get at least a couple handfuls of various colors and patterns for best results. Jane Valencia has some wonderfully informative articles on harvesting; see her tips in the April 2024 and August 2023 issues of The Vashon Loop.
Find a flat and clear space to work – we prefer to be outside on the deck, but a dining room table works just as well. Place your fabric on the cutting board and put a flower or leaf on the fabric, then place your second piece of fabric on top (or, if using one larger piece of fabric, fold it over on itself).
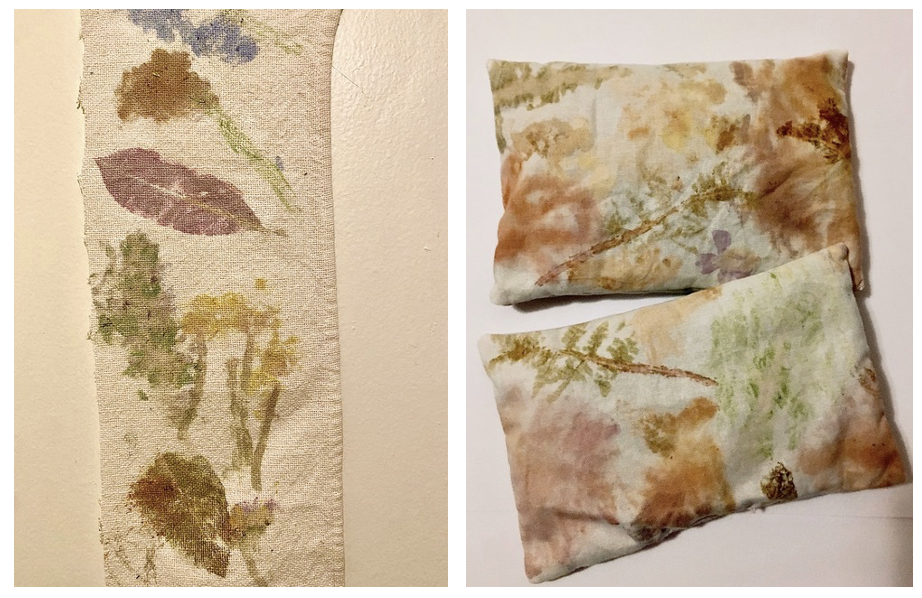
Take turns hammering over the entire flower, periodically checking that you are using enough force to get the desired color and print applied (or conversely, not hammering too hard and causing it to break apart or become too enmeshed in the fabric to remove). When finished, you should have a colorful impression of the flower on your fabric. You can then carefully peel off the plant matter left behind and compost it. Repeat this process until you have the look you want.
Now, depending on the age of your children, you can stop here – the fabric can be framed and made into wall art, you can even get creative and cut the fabric into a flower shape first – or you can keep going and make it into a sachet.
For the sachet, sew your fabric together (make sure that the most colorful/printed sides are facing inward!) until it forms a square, but leave about a 2” opening on the last side. Flip the square inside out, using a pencil to pop the corners out, and then fill your newly formed pouch with your dried herbs, making sure not to overfill. When the desired loftiness is reached, stitch up the hole by hand.
Now you have a thoughtfully handmade little gift that wonderfully showcases spring colors and shapes, and smells delightful! In time, the print will start to soften and eventually have more of a watercolor appearance, which is equally as lovely.
Some tips:
- Experiment with all sorts of colors, shapes, and sizes of flowers and leaves.
- Overlapping multiple flowers and leaves when hammering can give you a variety of colors and designs.
- You can also make specific images by intentionally placing flowers or leaves one at a time to “draw” out your picture.
- Go even bigger and make a scented eye pillow by using larger pieces of fabric and adding some dried beans, to give more weight in addition to the herbs.